
Matt Young
As an Amazon Associate, we earn from qualifying purchases.
Look, I’m going to be honest with you right off the bat. The first pizza I made at home was absolutely terrible. We’re talking cardboard crust, sauce that tasted like ketchup, and cheese that turned into rubber. But something about that disaster hooked me completely. Maybe it was the smell of yeast and flour, or the primal satisfaction of working with my hands, but I knew I had to figure this out.
Three years and probably 200 pizzas later, I can finally make something that doesn’t embarrass me in front of my Italian neighbors. And here’s what I’ve learned: making really good pizza at home isn’t about having the fanciest equipment or the most expensive ingredients. It’s about understanding why things work the way they do, and being willing to mess up a bunch of times until you get it right.
Where This All Started (And Why It Matters)
Pizza didn’t start as the Instagram-worthy, artisanal thing we know today. It was working-class food in Naples – something you could grab from a street vendor and eat while walking to work. The whole thing began because people needed cheap, filling food that didn’t require sitting down with a fork and knife.
The early versions weren’t even what we’d recognize as pizza. We’re talking flatbread with whatever was cheap and available – some oil, maybe garlic, herbs if you were lucky. Tomatoes didn’t even show up until the 18th century, and even then, a lot of Europeans thought they were poisonous. (Spoiler alert: they weren’t, and pizza got a whole lot better once people figured that out.)
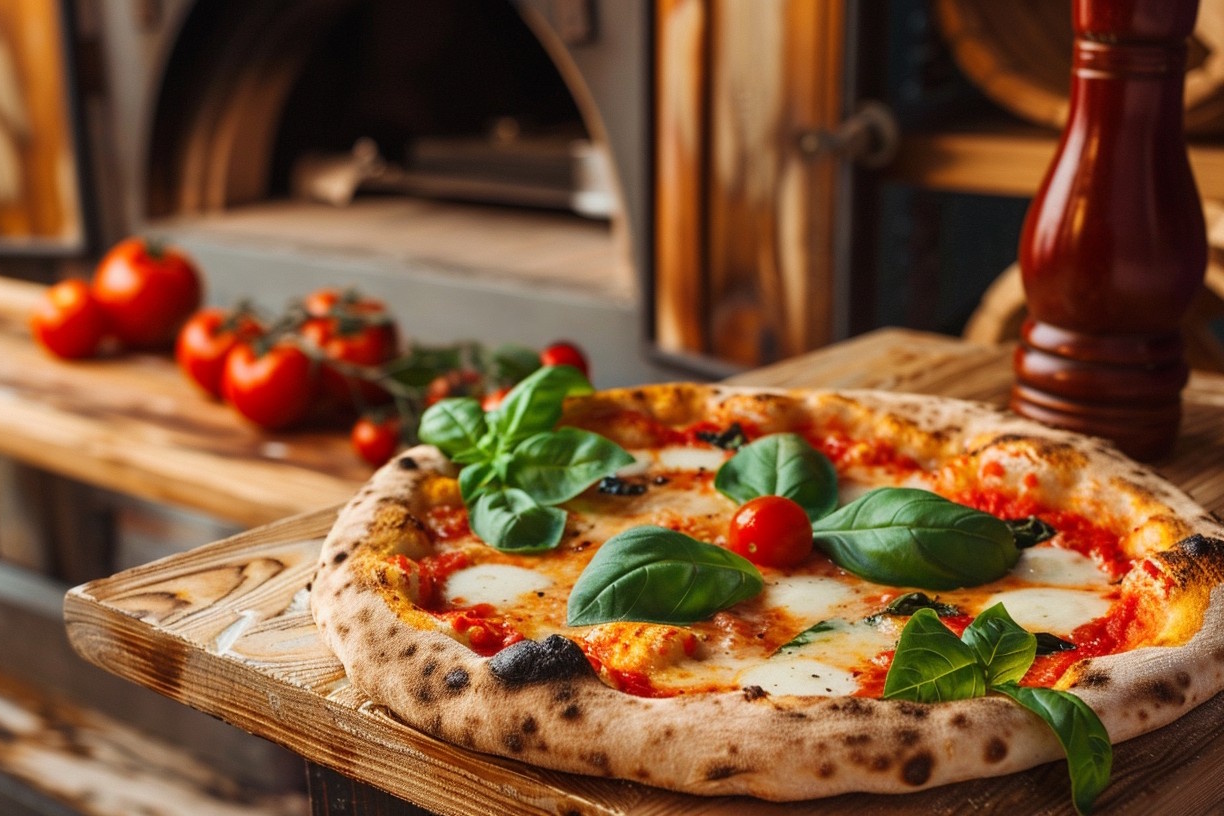
But here’s where it gets interesting. In 1889, this pizzaiolo named Raffaele Esposito supposedly made a special pizza for Queen Margherita when she visited Naples. He used tomatoes, mozzarella, and basil to match the Italian flag colors. Whether this story is completely true or just really good marketing, it gave us the Margherita pizza – and honestly, if you can master a proper Margherita, you understand pizza.
What’s brilliant about the Margherita isn’t just that it looks patriotic. It’s that those three ingredients create this incredible balance. The tomatoes bring acidity and sweetness, the mozzarella adds richness and creaminess, and the basil cuts through all that richness with its bright, herbal punch. It’s simple, but simple done right is harder than complicated done wrong.
What Happens When You Get It Right
When pizza works – really works – it’s kind of magical. The crust has this perfect contrast: crispy on the outside but still soft and slightly chewy inside, with those irregular charred spots that add this smoky complexity you can’t get any other way. The sauce doesn’t overpower anything, but it brightens every bite. The cheese melts into these beautiful, slightly browned pools that stretch when you pull a slice away.
And then there’s the temperature thing. Real pizza ovens run at around 900°F, which sounds insane until you realize what it does. At that heat, a pizza cooks in about 90 seconds. The outside of the dough sets immediately, trapping steam inside that creates those big, airy bubbles in the crust. The cheese doesn’t have time to dry out – it just melts and bubbles and gets those perfect brown spots.
Most home ovens max out around 550°F, which changes everything. Your pizza takes longer to cook, which means more moisture escapes, which means denser crust and drier cheese. But don’t worry – there are ways around this, and I’ll get to those.
The Tools That Actually Matter
You don’t need to spend a fortune, but a few key pieces of equipment will change your pizza game completely.
First up: pizza stone or steel. I went back and forth on this for months before finally buying a pizza steel, and I wish I’d done it sooner. Pizza stones work fine – they absorb and hold heat, giving you a crispy bottom crust. But pizza steels conduct heat better and don’t crack if you accidentally splash cold water on them (don’t ask how I know this).
Get it thick – at least half an inch for stone, quarter inch for steel. And big enough for your pizzas. I learned this the hard way when I bought a 12-inch stone and kept trying to make 14-inch pizzas on it. Math is not optional in pizza making.

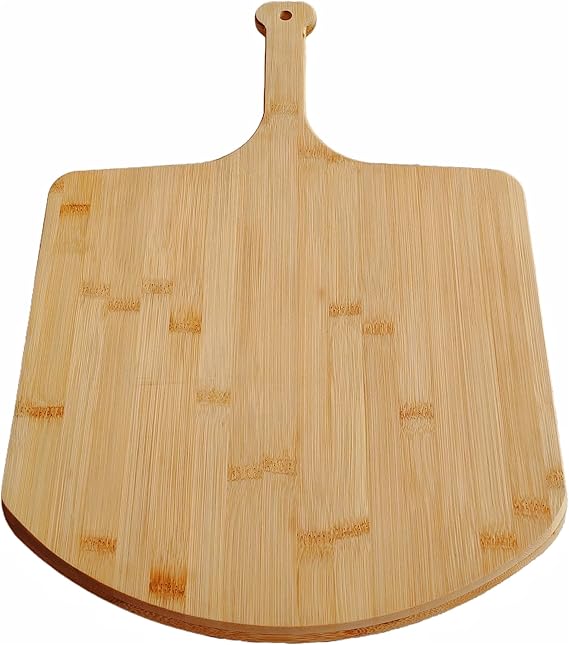
You need a pizza peel – that’s the big paddle thing you see pizza makers using. I have two: a wooden one for building pizzas (wood doesn’t conduct heat, so you can take your time), and a thin metal one for getting cooked pizzas out of the oven. The wooden one needs to be dusted with flour or semolina to prevent sticking. Learn from my mistakes and be generous with the flour. There’s nothing quite like watching your carefully crafted pizza accordion-fold as you try to unstick it from the peel.

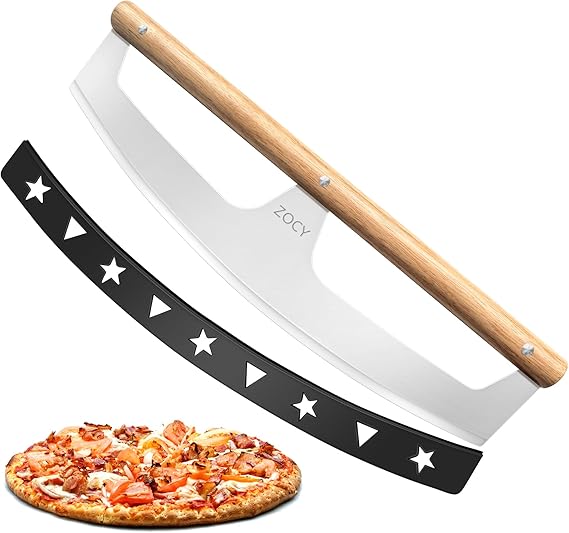
A good pizza wheel makes cutting so much easier. Those cheap ones from the grocery store don’t stay sharp and end up dragging toppings around instead of cutting cleanly. Spend the extra $15 for a decent one.

And get a kitchen scale. Seriously. I used to measure everything by volume and couldn’t figure out why my dough was different every time. Turns out flour packs differently depending on humidity, how you scoop it, and probably the phase of the moon. Once I started weighing ingredients, everything became more consistent.
Making Your Regular Oven Work Harder
Here’s the thing about home ovens: they’re not designed for pizza. They’re designed to roast a chicken at 350°F, not blast dough at 900°F. But you can trick them into performing better.
First, crank it to maximum temperature – probably 500-550°F. Put your pizza stone or steel on the lowest rack, or even on the oven floor if it fits. Let it preheat for at least 45 minutes. I know that seems like forever, but thermal mass takes time to heat up properly.
Some people swear by the broiler trick: turn on the broiler for 5-10 minutes to superheat the stone, then switch to bake mode and slide in your pizza. I’ve tried this and it definitely gives you a hotter stone surface for better bottom crust.
There’s also a more advanced (and riskier) technique where some people actually bake the pizza under the broiler for the last minute or two to get more char on top – but that’s where you really have to watch for burning.
Another trick is removing all the other racks. They just absorb heat and create obstacles. You want all that thermal energy focused on your pizza stone.
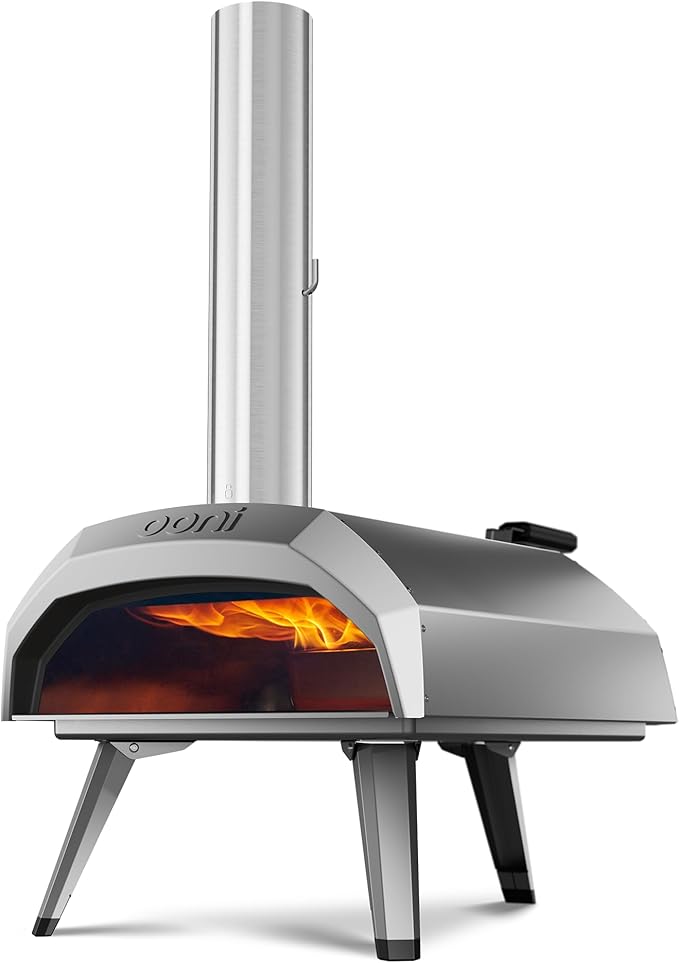
If you’re really serious about this (and slightly crazy), you can look into outdoor pizza ovens. The Ooni and similar brands make models that can hit 900°F and cook a pizza in 2-3 minutes. I don’t have one yet, but it’s definitely on my wish list.
Ingredients: Where Quality Actually Matters
You can’t make great pizza with terrible ingredients, but you also don’t need to break the bank. Here’s where to spend your money and where you can save it.
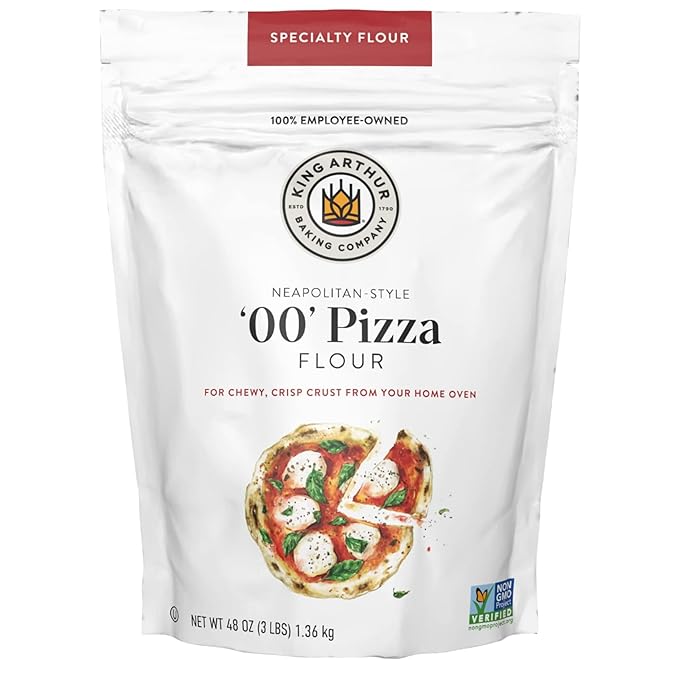
For flour, Italian 00 flour is supposed to be the gold standard. It’s finely milled and has moderate protein content (around 11-12%), which creates that classic Neapolitan texture. I’ve used it, and it’s good, but it’s also expensive and hard to find. Honestly, bread flour from the grocery store works great too. It has higher protein (12-14%), which means more gluten development and a chewier crust. Some people prefer that texture anyway.
Water matters more than you’d think. If your tap water tastes heavily chlorinated, you have a few options: most carbon filters (like Brita) will remove chlorine, or you can use bottled spring water. You can also just let tap water sit out overnight – chlorine evaporates on its own. Chlorine can mess with yeast activity, so it’s worth dealing with if your water tastes like a swimming pool. The water should be lukewarm when you mix it with yeast – around 110°F. Too hot kills the yeast, too cold and it won’t activate properly.
For yeast, I use instant yeast because it’s foolproof. You can mix it directly with the flour without proofing it first. Active dry yeast works fine too, but you need to dissolve it in warm water first. Fresh yeast gives the best flavor if you can find it, but it’s finicky and doesn’t keep long.
Don’t skimp on salt. It’s not just for flavor – it strengthens the gluten network and controls yeast activity. I use kosher salt because it doesn’t have additives and dissolves easily.
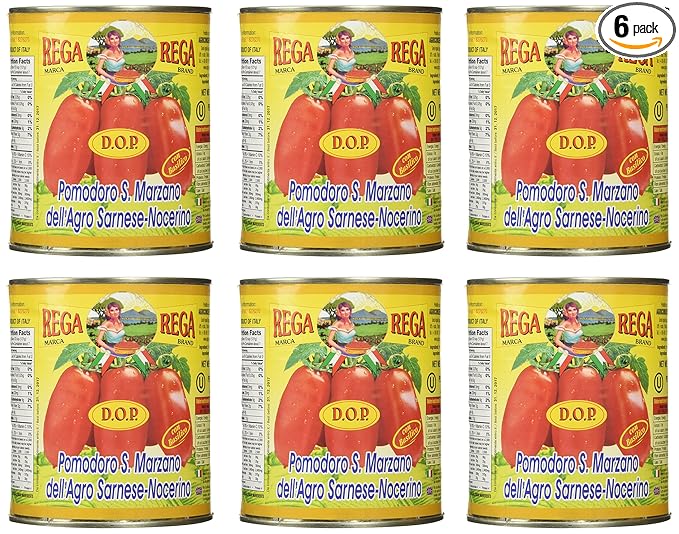
For tomatoes, San Marzano DOP are incredible if you can afford them. They’re sweet with just the right amount of acidity, and they break down beautifully for sauce. “D.O.P.” tells you they are guaranteed to be the genuine San Marzano variety, grown only in the Agro Sarnese-Nocerino region of Italy, near Mount Vesuvius, in the region’s volcanic soil and Mediterranean climate perfect for growing these tomatoes. But good whole canned tomatoes from California work fine too. Just avoid anything labeled “pizza sauce” – it’s usually overseasoned and too thick.
Mozzarella is where things get tricky. Fresh mozzarella tastes amazing but has a lot of moisture, which can make your pizza soggy. Low-moisture mozzarella melts better but can taste like nothing. I often use a mix: mostly low-moisture for good melting, with some fresh mozzarella torn up for flavor. And always tear it by hand – cutting it releases more moisture.
Fresh basil should smell incredible when you buy it. If it doesn’t knock you over with fragrance, find different basil. And add it at the very end, or even after cooking – it turns black and bitter if it cooks too long.
The Dough Dance
Making pizza dough is where you’ll either fall in love with this process or decide to just order delivery. It’s not complicated, but it requires patience and a little bit of faith.
The basic formula is simple: for every 500g of flour, you want about 325g of water (65% hydration), 10g of salt, and 3g of yeast. But the magic happens in how you put it together and what you do with it afterward.
Start by dissolving the yeast in the lukewarm water. I like to add a pinch of sugar to give the yeast something to eat, though it’s not strictly necessary. Let it sit for 5 minutes until it gets foamy. If it doesn’t foam, your yeast is dead and you need to start over.
Mix the flour and salt in a large bowl, then make a well in the center. Pour in the yeast mixture and start stirring from the center outward. It’ll look like a shaggy mess at first – that’s normal. Keep mixing until it forms a rough dough.
Now comes the fun part: kneading. You can do this by hand or with a stand mixer, but I prefer by hand because you can feel what’s happening to the dough. Turn it out onto a lightly floured surface and start kneading. Push the dough away from you with the heel of your hand, fold it back over itself, give it a quarter turn, and repeat.
At first, it’ll be sticky and uncooperative. Don’t add too much flour – a little stickiness is good. After about 8-10 minutes of kneading, something magical happens. The dough becomes smooth and elastic. It should pass the “windowpane test” – when you stretch a small piece thin enough to see light through it without tearing.
Put the dough in an oiled bowl, cover it with plastic wrap or a damp towel, and let it rise at room temperature for 2-3 hours until doubled in size. Then comes the best part: divide it into individual portions (I make 250g balls for personal pizzas), shape them into smooth balls, and put them on an oiled sheet pan.
Here’s where patience pays off. Put those dough balls in the refrigerator for at least 24 hours, but preferably 2-3 days. This cold fermentation is what develops the complex flavors that separate good pizza from great pizza. The enzymes break down proteins and starches, creating all these subtle flavor compounds you can’t get any other way.
Take the dough out 30-60 minutes before you want to use it, so it comes to room temperature and becomes easier to stretch.
Stretching Without Swearing
Stretching pizza dough is an art form, and like most art forms, you’re going to be terrible at it initially. I put holes in probably my first 20 attempts. But once you get the hang of it, there’s something deeply satisfying about watching a ball of dough transform into a thin, even circle.
Start with a well-floured surface and gentle hands. Take a dough ball and press it down from the center outward, leaving a slightly thicker border around the edges for the crust. Don’t use a rolling pin – it squeezes out all those beautiful gas bubbles you spent days developing.
The traditional method is to drape the dough over your knuckles and let gravity stretch it while you rotate it. This looks cool and works well once you know what you’re doing, but it’s also a great way to accidentally put your fist through the dough.
I usually stretch on the counter, working from the center outward with my fingertips. If the dough keeps snapping back, let it rest for 10-15 minutes. The gluten needs time to relax, and fighting it just makes everything harder.
The finished dough should be thin enough to see light through, but not so thin that it tears when you look at it wrong. Don’t worry about making it perfectly round – rustic looks better anyway.
Putting It All Together
Once your dough is stretched, you need to work fast. The longer it sits, the more likely it is to stick to your peel or tear when you try to move it.
Sauce first, but less than you think. I use maybe 1/3 cup for a personal pizza, spread thin with the back of a spoon. Leave a border around the edges for the crust. Too much sauce makes everything soggy and impossible to eat.
Cheese next. Distribute it evenly but don’t go crazy – you should still see sauce showing through. If you’re using fresh mozzarella, pat it dry with paper towels first.
Any other toppings should be used sparingly. I learned this lesson the hard way with a “everything pizza” that collapsed under its own weight. Less is more.
Getting the pizza from peel to oven is the moment of truth. Make sure your peel is well-floured, give the pizza a little shake to make sure it’s not sticking, then use a quick, confident motion to slide it onto your preheated stone. Hesitation is the enemy here.
Bake for 8-12 minutes, depending on your oven and how thick your crust is. You’re looking for golden brown with some charred spots on the crust, bubbling cheese with a few brown spots, and a bottom that sounds hollow when you tap it.
Add fresh basil in the last minute of cooking or immediately after it comes out of the oven. Let it cool for just a minute or two before cutting – I know it’s torture, but cutting it immediately makes all the cheese slide off.
Beyond the Basics
Once you’ve mastered the Margherita, the world opens up. The Marinara is actually older than the Margherita – just tomato sauce, garlic, oregano, and olive oil. It sounds simple, but when done right, it’s pure perfection.
I love making white pizzas in the winter – ricotta mixed with a little garlic and lemon zest as the base, topped with caramelized onions and whatever herbs I have growing on the windowsill. Or breakfast pizza with an egg cracked on top in the last few minutes of cooking.
The key with any variation is balance. Rich ingredients need something acidic to cut through them. Heavy toppings need something light. Sweet needs a touch of salt or heat.
Seasonal cooking makes sense with pizza too. Summer means fresh tomatoes and basil. Winter is perfect for hearty things like mushrooms and cured meats.
The Real Secret
Here’s what I wish someone had told me when I started: your first ten pizzas are going to be learning experiences. Maybe your first twenty. That’s not failure, that’s tuition. Every mistake teaches you something – too much sauce, not enough heat, dough that tears, cheese that burns.
The real secret isn’t any particular technique or ingredient. It’s paying attention. Notice how the dough feels different on humid days. Watch how your oven behaves. Taste everything and adjust next time.
And don’t take it too seriously. Yes, there’s technique involved, and yes, quality ingredients matter. But at the end of the day, you’re making flatbread with stuff on top. It’s supposed to be fun.
The best pizza I ever made was on a random Tuesday night when I was stressed about work and needed something to do with my hands. I wasn’t trying to be perfect or impress anyone. I just made dough, let it do its thing, and focused on the simple pleasure of creating something good to eat.
That’s what this is really about – not perfection, but the satisfaction of making something real with your own hands. Something that brings people together around a table, makes the house smell incredible, and connects you to thousands of years of humans doing the same thing.
So start simple, be patient with yourself, and remember that even a failed homemade pizza is usually better than good delivery. And once you get the hang of it, you’ll never want to order pizza again. Trust me on this one.